In the world of photography, mastering light exposure is key. It’s important for both new and seasoned photographers. This guide will teach you the basics of light exposure, helping you improve your photos.
Light exposure is the base of great photos. It lets us control the mood and look of our images. We’ll cover the exposure triangle and metering techniques. This will help you understand light exposure, camera settings, and photography tips.
Let’s explore the secrets of light exposure together. We’ll learn about aperture, shutter speed, and ISO. This will help you take stunning photographs in any lighting condition. Let’s start mastering photography essentials.
Understanding Light Exposure
Mastering light exposure is key to great photography. The exposure triangle is at the heart of this. It includes aperture, shutter speed, and ISO. These elements control how much light hits your camera’s sensor, shaping your image.
The Exposure Triangle
The aperture controls how much light gets in. Shutter speed decides how long that light is on. ISO makes your camera more or less sensitive to light. Together, they adjust your image’s brightness.
Learning to adjust these factors lets you take amazing photos in any light.
Evaluating Light Conditions
Lighting is vital for good exposure. First, figure out the light you have. Think about the time, weather, and shadows. This helps you set the right camera settings.
Getting good at light exposure takes time. But with practice, you’ll master the exposure triangle. Then, your photos will really stand out.

| Element | Function | Impact on Exposure |
|---|---|---|
| Aperture | Size of the lens opening | Larger aperture (smaller f-number) allows more light, smaller aperture (larger f-number) allows less light |
| Shutter Speed | Duration of the exposure | Faster shutter speed (smaller fraction) reduces light, slower shutter speed (larger fraction) increases light |
| ISO | Camera’s sensitivity to light | Higher ISO boosts brightness but can introduce more noise, lower ISO reduces brightness but provides cleaner images |
Aperture: Controlling Light Intensity
Aperture is key in the exposure triangle. It controls how much light gets into your camera. By learning about aperture, you can get amazing depth of field and bokeh. You’ll also get the best light in your photos.
The aperture is shown by the f-stop value. It’s the lens opening that lets light in. A big aperture (low f-stop) lets more light in. A small aperture (high f-stop) lets less light in.
Changing the aperture affects your photo’s depth of field. A big aperture (low f-stop) makes the background blurry. This creates a beautiful bokeh effect. A small aperture (high f-stop) keeps more of the scene sharp.
- Try different apertures to get the depth and bokeh you want.
- A big aperture (low f-stop) lets more light in. A small aperture (high f-stop) lets less light in.
- Think about the light and what you want to show when picking an aperture.
Mastering aperture lets you control light, depth, and bokeh in your photos. This way, you can take stunning, professional pictures.

Shutter Speed: Freezing or Blurring Motion
Shutter speed is key in photography. It lets us capture the world in unique ways. We can freeze or blur motion, making our photos stand out.
Mastering Motion Blur
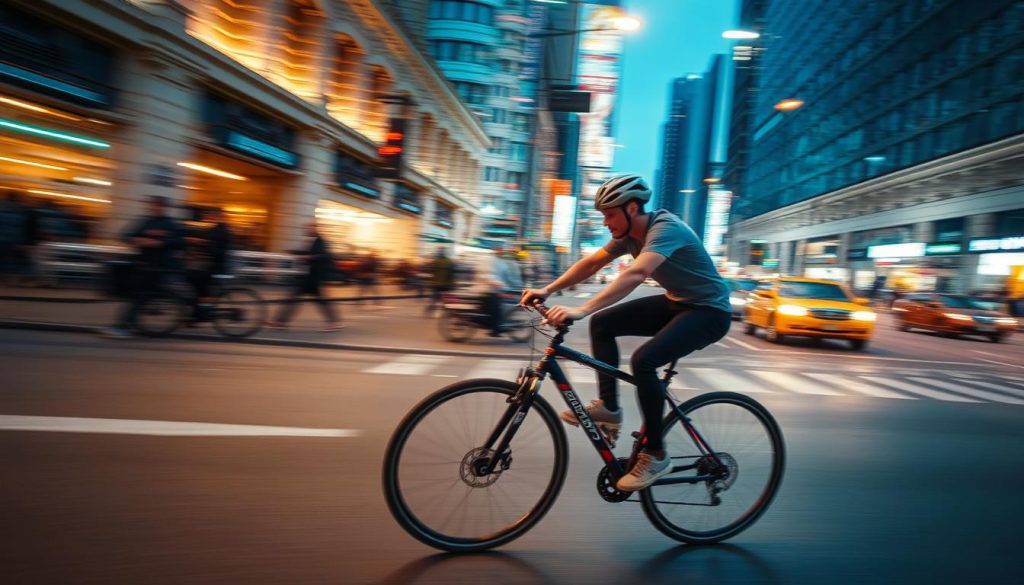
Motion blur is a powerful tool in photography. A slower shutter speed captures movement, giving our photos a dreamy feel. This adds energy and dynamism.
To get great motion blur, try panning or long exposure. Panning means following your subject with the camera. Long exposure shots capture light flow over time. These can make waterfalls and car headlights look amazing.
A faster shutter speed freezes action. This is great for sports and wildlife photos. It captures the exact moment without blur.
Knowing how shutter speed, motion blur, and freezing action work opens up creative possibilities. It lets us tell stories and capture the world in a way that touches our audience.

ISO: Boosting Sensitivity in Low Light
In photography, ISO is key for great shots in dim light. It makes the camera’s sensor more sensitive. This lets us take amazing photos even when it’s dark.
Mastering Noise Reduction Techniques
When we raise the ISO, we might see image noise. This grainy look can ruin our photos. But, we can lessen noise and keep our photos clear.
- Use your camera’s noise reduction settings: Many cameras have special algorithms for this.
- Shoot in RAW format: RAW files let you edit more, including noise reduction.
- Use image editing software: Tools like Adobe Lightroom and Photoshop have great noise reduction tools.
Learning about ISO and noise reduction helps us get the best from our cameras. We can make amazing photos, even in tough light. With these skills, our photos will show our creativity and skill.
| ISO Value | Image Quality | Noise Level |
|---|---|---|
| 100 | Excellent | Minimal |
| 400 | Good | Moderate |
| 1600 | Fair | High |
| 6400 | Poor | Severe |
Metering Modes: Finding the Right Exposure
Capturing stunning photos needs more than just a good eye and steady hand. Getting the right exposure is key. Knowing your camera’s metering modes helps you balance light well. We’ll look at different metering modes and how to use them for accurate exposure in any light.
The five main metering modes are:
- Evaluative metering: This mode looks at the whole scene. It considers brightness, contrast, and subject position to find the best exposure.
- Spot metering: Spot metering focuses on a small area. It’s great for metering on a specific subject or highlight, even in tough light.
- Center-weighted metering: This mode focuses on the center of the frame. The rest of the frame is less important in the exposure calculation. It’s good for subjects in the middle.
- Partial metering: Like spot metering, but it looks at a slightly bigger area. It’s useful for off-center subjects or when you want to highlight a part of the frame.
- Matrix/Multi-segment metering: This advanced mode breaks the scene into segments. It calculates the best exposure based on the different tones and subject positions in the frame.
Choosing the right metering mode depends on the light and your vision. Try out different modes to find what works best for you. This way, you’ll get the perfect exposure every time.
| Metering Mode | Description | Best Use |
|---|---|---|
| Evaluative | Analyzes the entire scene to determine the optimal exposure. | General-purpose shooting, backlit scenes, high-contrast situations. |
| Spot | Meters a small, specific area of the frame. | Isolating a subject, ensuring accurate exposure of highlights or shadows. |
| Center-weighted | Prioritizes the center of the frame in the exposure calculation. | Subjects positioned in the center of the frame, portraits. |
| Partial | Meters a slightly larger area than spot metering. | Off-center subjects, emphasizing specific elements in the frame. |
| Matrix/Multi-segment | Analyzes the entire scene and divides it into multiple segments. | General-purpose shooting, high-contrast scenes, backlit situations. |
By mastering the different metering modes, you can control your camera’s exposure. This lets you capture images that show your creative vision.
Mastering Light Exposure
Now you know the basics of light exposure. It’s time to practice what you’ve learned. We’ll dive into advanced techniques and strategies for mastering light exposure. You’ll learn how to get unique and striking results.
Understanding your camera’s exposure settings is key. Adjusting aperture, shutter speed, and ISO lets you create different effects. You can freeze motion or blur the background for a dreamy look.
For example, a wide aperture (low f-number) creates a shallow depth of field. This isolates your subject and blurs the background. A smaller aperture (high f-number) captures more in focus, great for landscapes or buildings.
Working with different lighting is also crucial. Whether it’s bright sunlight, cloudy skies, or low light, adjusting your camera settings is essential. By trying different techniques, you can achieve creative and balanced exposures.
Here are some tips to get you started:
- Try different aperture settings for your desired depth of field.
- Change shutter speed to freeze or blur motion as you like.
- Use ISO to increase sensitivity in low light, but watch for noise.
- Explore metering modes for accurate exposures in various lights.
- Bracket exposures to capture the perfect shot.
Mastering these techniques will help you create stunning images. Your unique vision and style will shine through.
| Technique | Description | Example Use Case |
|---|---|---|
| Shallow Depth of Field | Using a wide aperture (low f-number) to create a blurred background and isolate the subject. | Portrait photography, close-up shots, and bokeh effects. |
| Freezing Motion | Adjusting the shutter speed to a fast setting to capture sharp, frozen images of fast-moving subjects. | Sports, wildlife, and action photography. |
| Intentional Motion Blur | Using a slower shutter speed to create a sense of movement and dynamism in the image. | Capturing the energy of a city street, waterfalls, or moving vehicles. |
Bracketing: Ensuring Perfect Exposure
In photography, bracketing is a key tool for the perfect shot. It lets us take many exposures to get the best image, even in tough light. This method is crucial for capturing great photos.
Automatic Bracketing Modes
Today’s DSLR and mirrorless cameras have automatic bracketing. It makes taking bracketed photos easy. With a few clicks, we can take images with different exposures.
This is great for scenes with lots of contrast. The camera might struggle to show both bright and dark areas well. Automatic bracketing helps us get a series of photos, from too dark to too bright. We know at least one will be just right.
This technique is a big help for HDR photography. It lets us mix different exposures to make amazing, balanced images.

